

Leather Product Design: From Concept to Production
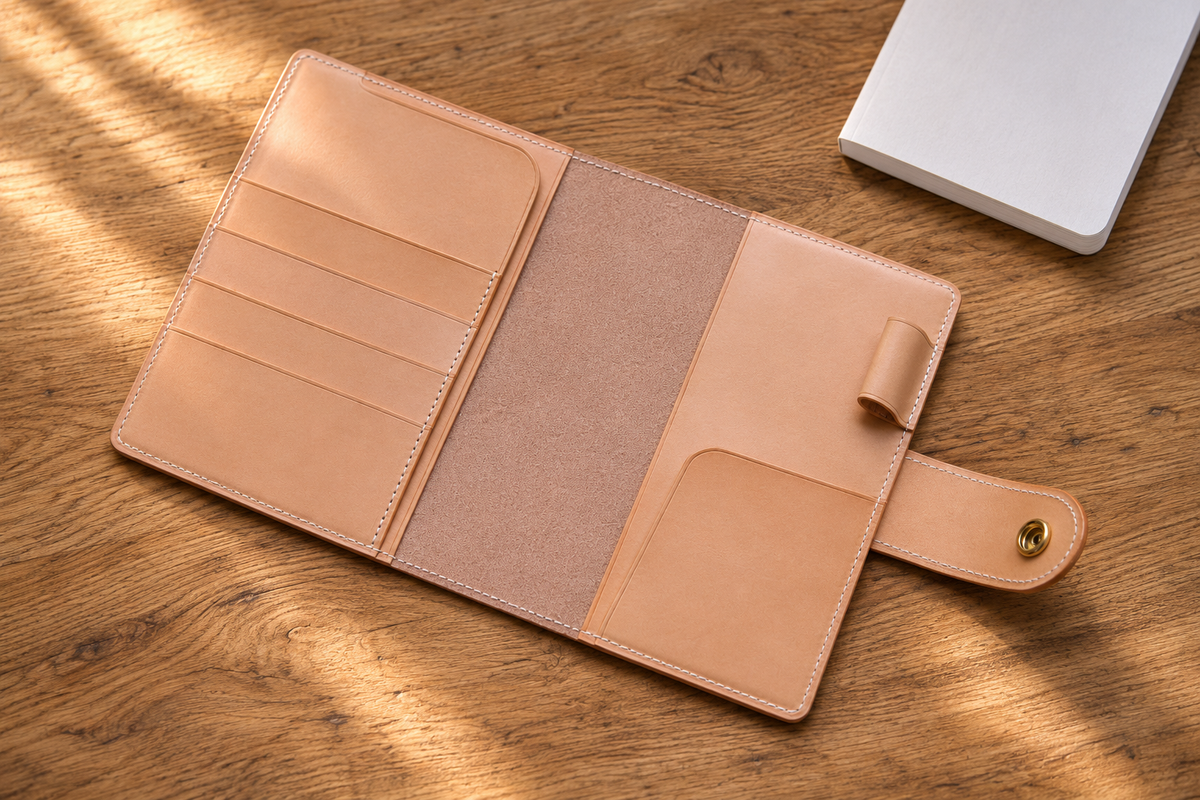
Begin with a notebook cover on a desk. Picture its owner opening it for a meeting, slipping a pen into its loop and folding it closed around a favourite notebook. Decide what you want each of those gestures to feel like before choosing a colour or drawing a logo.
Approach leather product design through these small, deliberate decisions. Give the piece a purpose, work through its construction and let the prototype answer the questions a drawing leaves open. For a brand developing its first collection, the following stages offer a way to turn an appealing idea into a clearly described object.
Planning a leather product design around its purpose
Start with the person who will use the piece, what it should hold and the moment it belongs to.
For a notebook cover, choose the notebook itself before settling the proportions. For a bag, set out the objects you intend it to carry. Describe the occasion in a few plain words: a portfolio for presentations, a small case for a watch, a tote for the working day. Keep that sentence beside the first sketches and use it to judge every proposed addition.
Give the concept a visual direction, too. You might choose a generous, softly curved form in deep brown, or a compact outline with a narrow border and a discreet interior mark. Select a few reference images for particular details, naming what interests you in each. A handle shape, a corner or an arrangement of pockets is a more precise starting point than a general request for elegance.
Lunburg's Atelier Services develops, prototypes and produces original leather goods for brands, either through the full process or at selected stages. Bring the intended use and your existing work to the conversation, whether that is a written idea, a drawing or a sample you have developed yourself.
Structural design and patterns: giving the idea dimensions
Describe the structure with dimensions, a full-size layout and a proposed arrangement of seams, folds and openings.
Begin with what sits inside. Under ISO 216, an A5 sheet measures 148 by 210 mm, and an A6 sheet measures 105 by 148 mm. For a notebook cover, record the actual notebook's thickness as well as its page format. Treat the paper dimensions as a starting reference; develop the cover around the complete notebook you intend to use.
Draw the piece open and closed. Mark the pockets, the proposed stitch line and the space reserved for a closure. Try a full-size paper model to explore the arrangement, then leave the leather construction for discussion with the maker. On the working drawing, reserve space for notes about seam allowances, stitch spacing and where the leather should be thinned.

For its folded-edge construction, Lunburg describes skiving to a tolerance of 0.1 mm. Consider the edge as part of the design from the first drawing: choose the outline you want to see, then develop the corner and fold with the atelier. Give a border or an opening the same attention as the silhouette of the whole piece.
Choosing materials and processing methods
Choose the leather and proposed treatments together, with the intended feel and construction in view.
Lay the material sample beside the sketch. Handle it, fold it gently and consider how you would like the finished object to sit in the hand. For an illustrative notebook-cover brief, you might seek a quiet surface, a warm colour and an understated mark inside the front cover. Put those preferences into words, then explore them in samples rather than relying on a colour name alone.
A European tanning reference describes greater heat resistance and flexibility in chrome-tanned leather than in vegetable-tanned leather. Use that comparison as a prompt for a conversation about the particular material, its intended use and the finish you have in mind. Avoid making the tanning method your entire material brief.
Consider the artwork at its intended size, too. Lunburg states a minimum embossing line weight of 0.4 to 0.5 mm for clear reproduction on its 2.0 mm vegetable-tanned vachetta. Keep that figure attached to the stated material and treatment. For your design, request a trial of the chosen mark on the chosen leather, and judge its smallest details alongside the surrounding surface.

Samples, prototypes and revisions
Use the prototype to assess the complete object in use, then describe each revision against the agreed design.
The French official careers agency describes a sequence from sketch and pattern to prototype, with the prototype serving as the model for production. Give this stage room for close attention. Place the intended contents inside the sample, open and close it, carry it and view it from the angles its owner will see. Return to the original sentence about its purpose as you do so.
Make the revision notes specific. Instead of writing that a notebook cover feels wrong, describe the change you want to explore: a shorter pen loop, a different pocket opening or a revised position for the interior mark. Put the proposed change beside a photograph or drawing, and retain the earlier version for comparison.

At Lunburg, prototyping typically takes 2 to 4 weeks, depending on design complexity and material availability. Revisions needed to achieve the agreed design are included; changes to that agreed design are quoted separately. Distinguish refinement from a new direction in your own notes. Before approving the sample, gather the final decisions into one version of the brief, with photographs of the piece you have accepted.
Moving into production: minimum quantities and timing
Plan production around the agreed model, its colours and the schedule established for the project.
Lunburg's Atelier Services has a minimum production order of 50 pieces per colour per model. Keep both parts of that statement in view when shaping a first collection. Decide whether the collection should begin with one object in a single colour, or whether several forms and colours are central to the concept. Set out each proposed combination separately when discussing the commission.
Production timelines at Lunburg are agreed for each project. Keep the prototype stage and the production stage distinct in your calendar, with an explicit point for approving the design between them. If you revise the object, bring that revision into the scheduling conversation rather than treating an earlier outline as a finished plan.
Lunburg inspects materials and finished pieces and checks them against the approved prototype. Keep the approved sample, final artwork and specification identified together as the reference for the commission. For the broader choice of production partner, see our guide to choosing a leather goods manufacturer.
Own-brand products and design ownership
Agree how the original design and its development materials will be owned and handed over before development begins.
Lunburg states that clients' designs remain theirs, while retaining its own existing designs, techniques and equipment. Ownership of patterns, technical files, prototypes and custom tooling is agreed in the quotation, which also sets the design handover terms. Read those terms alongside your plans for the object, including any intention to develop related pieces later.
Treat the individual development materials with care in that conversation. Name the drawings, pattern files, physical sample and any custom tooling you expect to receive. Describe the form in which you would like to keep them and the intended use. Give the brand artwork its own clear place in the brief, with the approved version and proposed positioning shown together.
For leather product design under your own brand, make authorship and handover part of the initial discussion. Bring the creative brief and your expectations for those materials to Lunburg's Atelier Services, so the proposed commission can address both the object and the work behind it.
Japanese trade bodies and regional craft research
Begin Japanese industry research with the national associations, then investigate a region through the particular products and techniques that interest you.
The Japan Leather and Leather Goods Industries Association is the umbrella body for Japan's leather industry and directs readers to member associations for shoes, bags, handbags and small goods. The Japan Bag and Handbag Association publishes a basic-knowledge book covering subjects including materials, care and quality standards, alongside a glossary of more than 200 terms for parts, products and processing techniques. It also runs a technical certification exam in three categories: bags, handbags and small goods, for makers working in natural leather.
Use these organisations as starting points for the vocabulary of your brief. When discussing a pocket, handle or finishing detail with a Japanese partner, pair the term with a drawing of the exact feature you mean. Keep the intended product category clear throughout the conversation.
For regional research, follow a particular object or technique rather than choosing on a place name alone. Look for an identified workshop, a documented account of its work and examples relevant to your design. Bring the discussion back to the piece: the opening, the edge, the way it is held and the purpose you set out to fulfil.
Read more
Saddler or Leather Goods Maker: What Is the Difference?
Discover how saddlers and leather goods makers overlap, what each makes, and how their techniques, French names and training routes compare.
Read more
Choosing a Leather Notebook as a Corporate Gift
Choose a leather notebook corporate gift around the person who will use it, with guidance on sizes, refillable covers, leather and personalisation.
Read moreDevelop your next leather product
Bring an idea, sketch, sample or technical file. Lunburg Atelier Services supports product development, material selection, prototyping and production, according to the stages your project needs.
Explore Atelier Services